[fusion_builder_container hundred_percent=”no” equal_height_columns=”no” menu_anchor=”” hide_on_mobile=”small-visibility,medium-visibility,large-visibility” class=”” id=”” background_color=”” background_image=”” background_position=”center center” background_repeat=”no-repeat” fade=”no” background_parallax=”none” parallax_speed=”0.3″ video_mp4=”” video_webm=”” video_ogv=”” video_url=”” video_aspect_ratio=”16:9″ video_loop=”yes” video_mute=”yes” overlay_color=”” video_preview_image=”” border_size=”” border_color=”” border_style=”solid” padding_top=”” padding_bottom=”” padding_left=”” padding_right=””][fusion_builder_row][fusion_builder_column type=”1_1″ layout=”1_1″ background_position=”left top” background_color=”” border_size=”” border_color=”” border_style=”solid” border_position=”all” spacing=”yes” background_image=”” background_repeat=”no-repeat” padding_top=”” padding_right=”” padding_bottom=”” padding_left=”” margin_top=”0px” margin_bottom=”0px” class=”” id=”” animation_type=”” animation_speed=”0.3″ animation_direction=”left” hide_on_mobile=”small-visibility,medium-visibility,large-visibility” center_content=”no” last=”no” min_height=”” hover_type=”none” link=””][fusion_text]
ESP32를 웹소켓 클라이언트로 동작시키기 위해서는 앞서 소개했던 ESP8266용 웹소켓 라이브러리를 이용합니다.
[ESP32] 웹소켓 프로그래밍으로 라즈베리파이와 통신하기 – (1) Server 구현하기
라이브러리 준비가 완료되었으면 아래의 코드를 구현합니다.
.
< ESP32 – Client >
#include <WiFi.h>
#include "SsidInfo.h"
#include <WiFiConnection.h>
#include <WebSocketClient.h>

WebSocketClient webSocketClient;
WiFiClient client;

const char* ssid     = "USER_SSID";
const char* password = "PASSWORD";

char path[] = "/";
char host[] = "192.168.219.107";    # 웹소켓 서버 주소

int count = 0;

void setup()
{
    Serial.begin(115200);
    delay(10);

    Serial.println();
    Serial.println();
    Serial.print("Connecting to ");
    Serial.println(ssid);

    WiFi.begin(ssid, password);

    // 와이파이망에 연결
    while (WiFi.status() != WL_CONNECTED) {
        delay(500);
        Serial.print(".");
    }

    Serial.println("");
    Serial.println("WiFi connected");
    Serial.println("IP address: ");
    Serial.println(WiFi.localIP());
    delay(5000);

    // 서버에 연결
    if (client.connect(host, 80)) {
        Serial.println("Connected");
    } else {
        Serial.println("Connection failed.");
    }
    delay(1000);

    webSocketClient.path = path;
    webSocketClient.host = host;

    if (webSocketClient.handshake(client)) {
        Serial.println("Handshake successful");
    } else {
        Serial.println("Handshake failed.");
    }
}

void loop() {
  delay(1000);
  String data;

  if (client.connected()) {
    // 데이터 전송
    webSocketClient.sendData("msg count : "+String(count++));
    // 데이터 수신
    webSocketClient.getData(data);
    if (data.length() > 0) {
      Serial.println(data);
    }
  } else {
    Serial.println("Client disconnected.");
  }

  delay(3000);
}
.
ESP32 웹소켓 클라이언트는 숫자를 1씩 증가시키면서 서버 쪽으로 메세지를 보낼 예정입니다.
웹소켓 클라이언트를 구성했을 때와 마찬가지로, 파이썬을 이용해 라즈베리파이에 웹소켓 서버를 구성할 겁니다.
파이썬을 이용해 간편하게 웹소켓 서버 프로그래밍을 하기 위해 PIP를 이용해 websockets 모듈을 다운로드 받습니다.
pip3 install websockets
설치가 완료되었으면 아래의 코드를 구동시킵니다.
< Raspberry PI – Server >
.
import socket
import fcntl
import struct
import asyncio
import websockets

def get_ipaddress(network):
    s = socket.socket(socket.AF_INET, socket.SOCK_DGRAM)
    return socket.inet_ntoa(fcntl.ioctl(
        s.fileno(),
        0x8915,  # SIOCGIFADDR
        struct.pack('256s', network[:15].encode('utf-8'))
    )[20:24])


async def echo(websocket, path):
    async for message in websocket:
        print(message)
        await websocket.send(message)

print("Server start : "+get_ipaddress('eth0'))

port = 80
asyncio.get_event_loop().run_until_complete(
    websockets.serve(echo, get_ipaddress('eth0'), port))
asyncio.get_event_loop().run_forever()
.
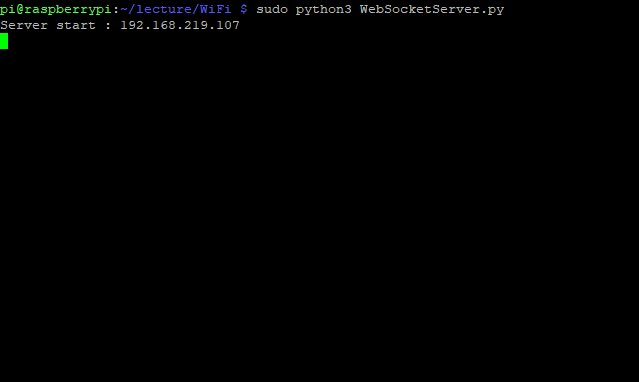
파이썬 코드를 실행시키면 서버는 접속이 있기까지 대기합니다.
이제 ESP32에 전원을 인가해 프로그램을 구동시키면 메세지를 주고 받기 시작합니다.
.
참고자료
https://www.dfrobot.com/blog-775.html
https://techtutorialsx.com/2017/11/01/esp32-arduino-websocket-client/
https://pypi.org/project/websockets/
[/fusion_text][/fusion_builder_column][/fusion_builder_row][/fusion_builder_container]

